|
About Platycerium Spores Much of the information on this page has evolved in
cooperation with Ron Battershill, Director at the |
|
| Background Information on Platycerium Spore Platycerium spore grow on the underside of the fertile fronds of Platycerium Ferns. More commonly known as Staghorn and/or Elkhorne Ferns. The underside of the fertile fronds grow spore patches that are originally greenish brown and turn to brown as they mature and then the exhausted spore patch gradually becomes a stain on the underside of the fertile frond. You want to capture the spore pods as they mature. To summarize, we have spore, spore pods, and spore patches. What I call spore pods may be more properly called sporangia. The spore patches are groups of spore pods (sporangia) which contain the spore. When the spore patch is mature, slight pressure from adjacent fronds, bursts of wind, insects, birds, and yes even gardeners causes the spore pod to spring open and cast the spore into the wind where eventually they find a new home and become thriving new plants. But first the spore need to pass many tests of life to survive. In the perfect situation, the spore, which are basically single cells, land on a surface and a coating on the cell causes it to adhere to a surface. In time, ranging from a few weeks to 6 or more months, the spore grow into prothallia or gametrophyte. In cultivation, the high concentration of gametrophyte look like a green mat on the growing medium. Individually, as an analogy, the prothallia look like hearts with eggs on the top surface (lobes) of the heart, and male sperm at the bottom of the heart. In this state, the male sperm fertilize the eggs. The fertilized eggs then grow into sporophytes, or new platycerium plants. This process can take 5 to 10 years before one has a fully grown fern producing more spore. When sowing hybrids, the spore from two different species are put together and shaken. Then they are spread on the growing medium to form prothalilia and a resulting hybrid cross of the two species. Below you sill see photos of the various stages of spore propagation of P. superbum and P. bifurcatum and a growing medium kit.
|
|
 Sunshine
Mix #3 Growing Medium for Spore Sunshine
Mix #3 Growing Medium for SporeThe Los Angeles International Fern Society has had the most success and recommend using Sunshine Mix #3 for propagating spore because it is relatively free of contaminants and full of nutrients. Sunshine Mix #3 is available commercially, but only comes in $80 bails and is used by commercial growers for propagating spore. Because most readers can not use an $80 bail in a lifetime, we offer small quantities for retail sale complete with a resealable growing container. YouTube has some videos where you mix peat moss and sponge rock and microwave it to kill all the contaminants that will kill new spore. However, we feel you also kill all the good nutrients in the peat moss with the microwave. Each kit comes complete with instructions for growing. Because of the nature of growing spore, and finding the correct growing environment, we recommend purchasing 2 or3 kits and experiment with different growing locations around your home to find the best growing location. A place that offers good temperature differentials between night and day to promote condensation, maintains an average temperature of about 70 degrees F, and good filtered light, but not direct sunshine is a preferable location. The cost is $5 per kit and Priority Mail shipping is $7 for up to 6 kits. Once you receive the kit, sprinkle the sporangia with spore on top of the mix and mist with a spray bottle filled with bottled RO drinking water until the medium is like a thick soup. Never add fertilizer or Super Thrive and when opening to inspect, prevent bacteria from entering the cup. It is a good idea to label the top with the species and date. Some growers suggest separating the spent sporangia from the spore and only placing the spore on top of the medium. I feel the spent sporangia will fall to the bottom of the medium and not cause any problems. You lose less spore this way. The fresher the spore the higher the success rate. However if spore is kept refrigerated, spore collected last year should be fine. Different spore species have different lifespan. |
|
|
Click on photos to enlarge |
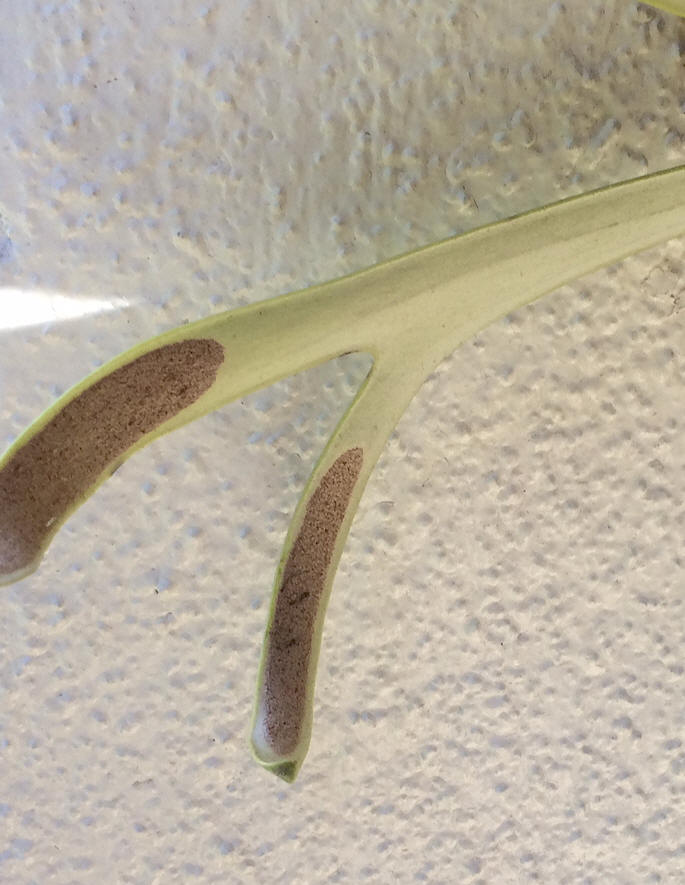
The fertile frond from a P. bifurcatum showing the spore patch. This patch looks to be ready to volunteer spore. It is not green (young) or blotchy (exhausted), but offering a nice ripe patch of spore. To collect the spore pods, use a soft artists fan brush or gently rub your finger across the spore patch and let the spore pods, and spore, fall into your planting mix, or a piece of white paper. |
|
Click on photos to enlarge |
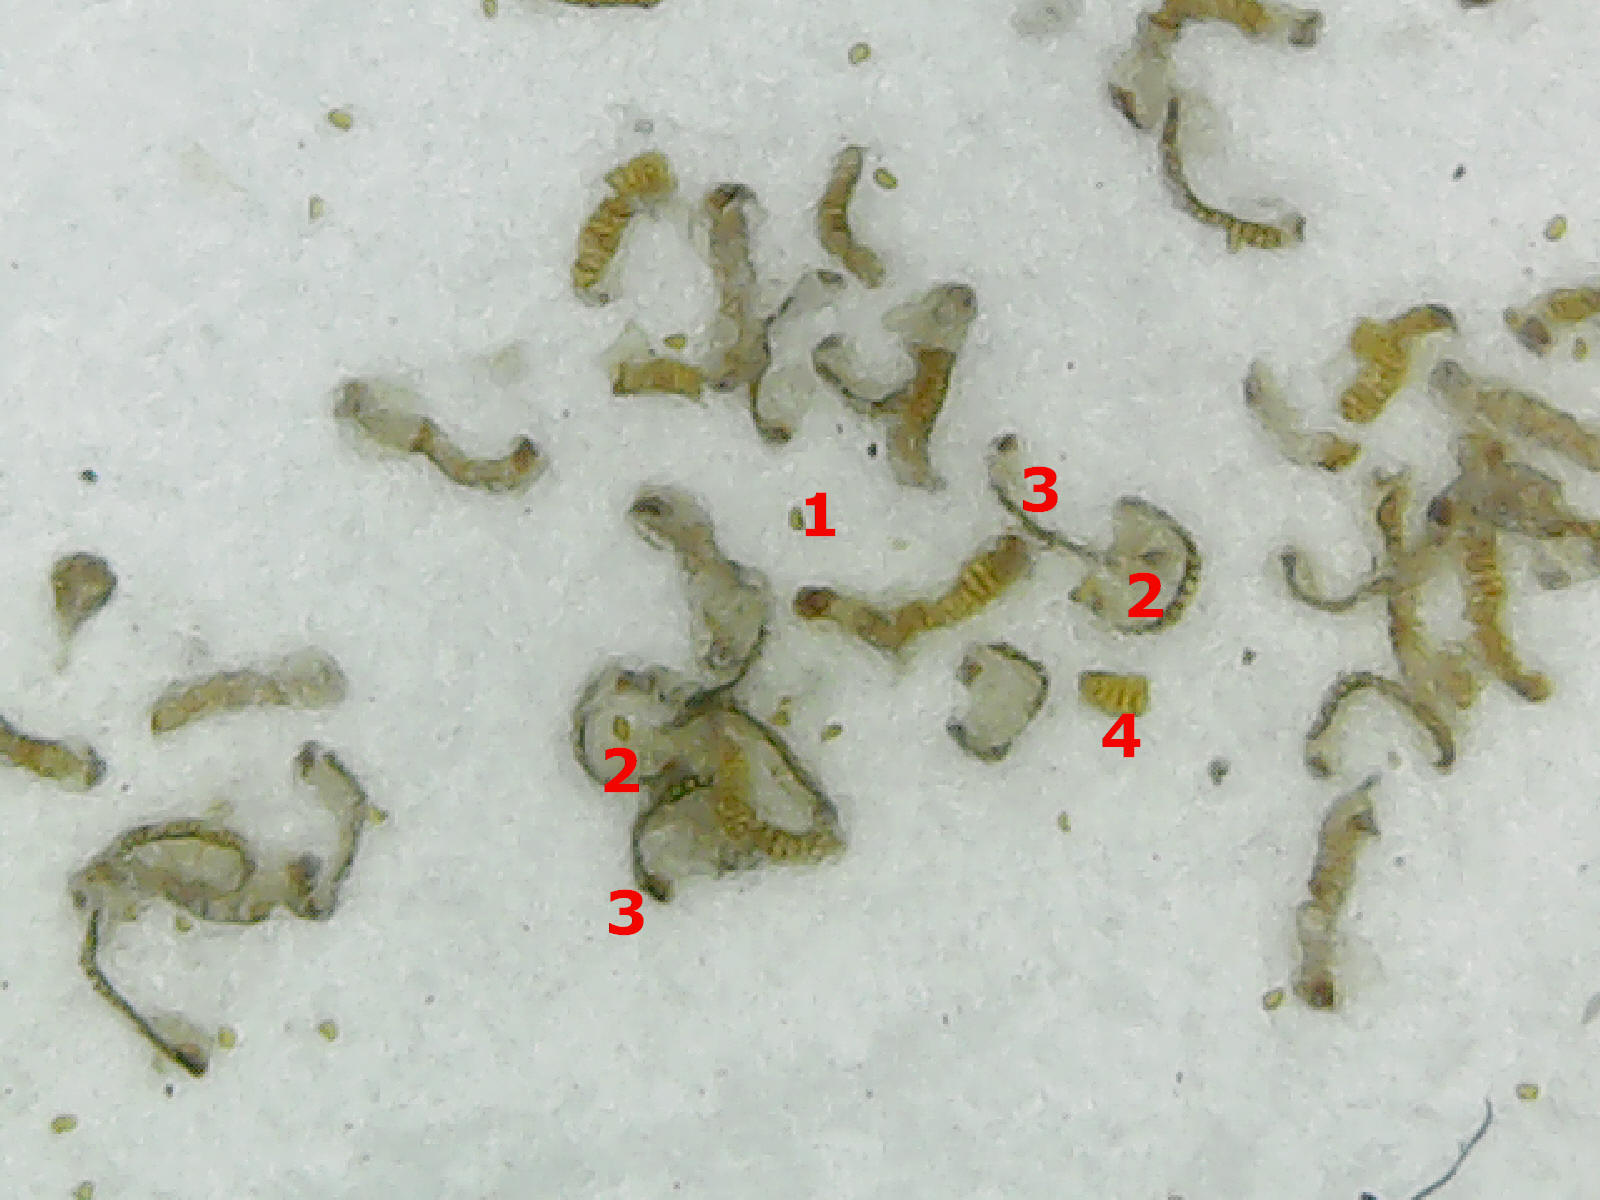
Collection of P.
biforcatum spore pods and spore on white paper. The spore pods
are the brownish worm like pieces and the spore which have been released
are the small egg shaped single cells.
|
|
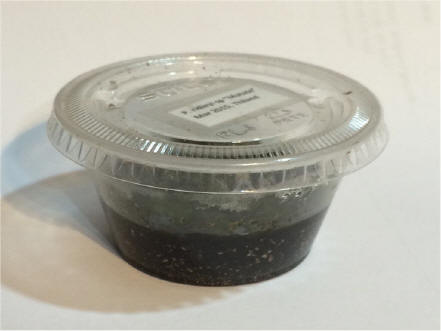
Click on photos to enlarge |
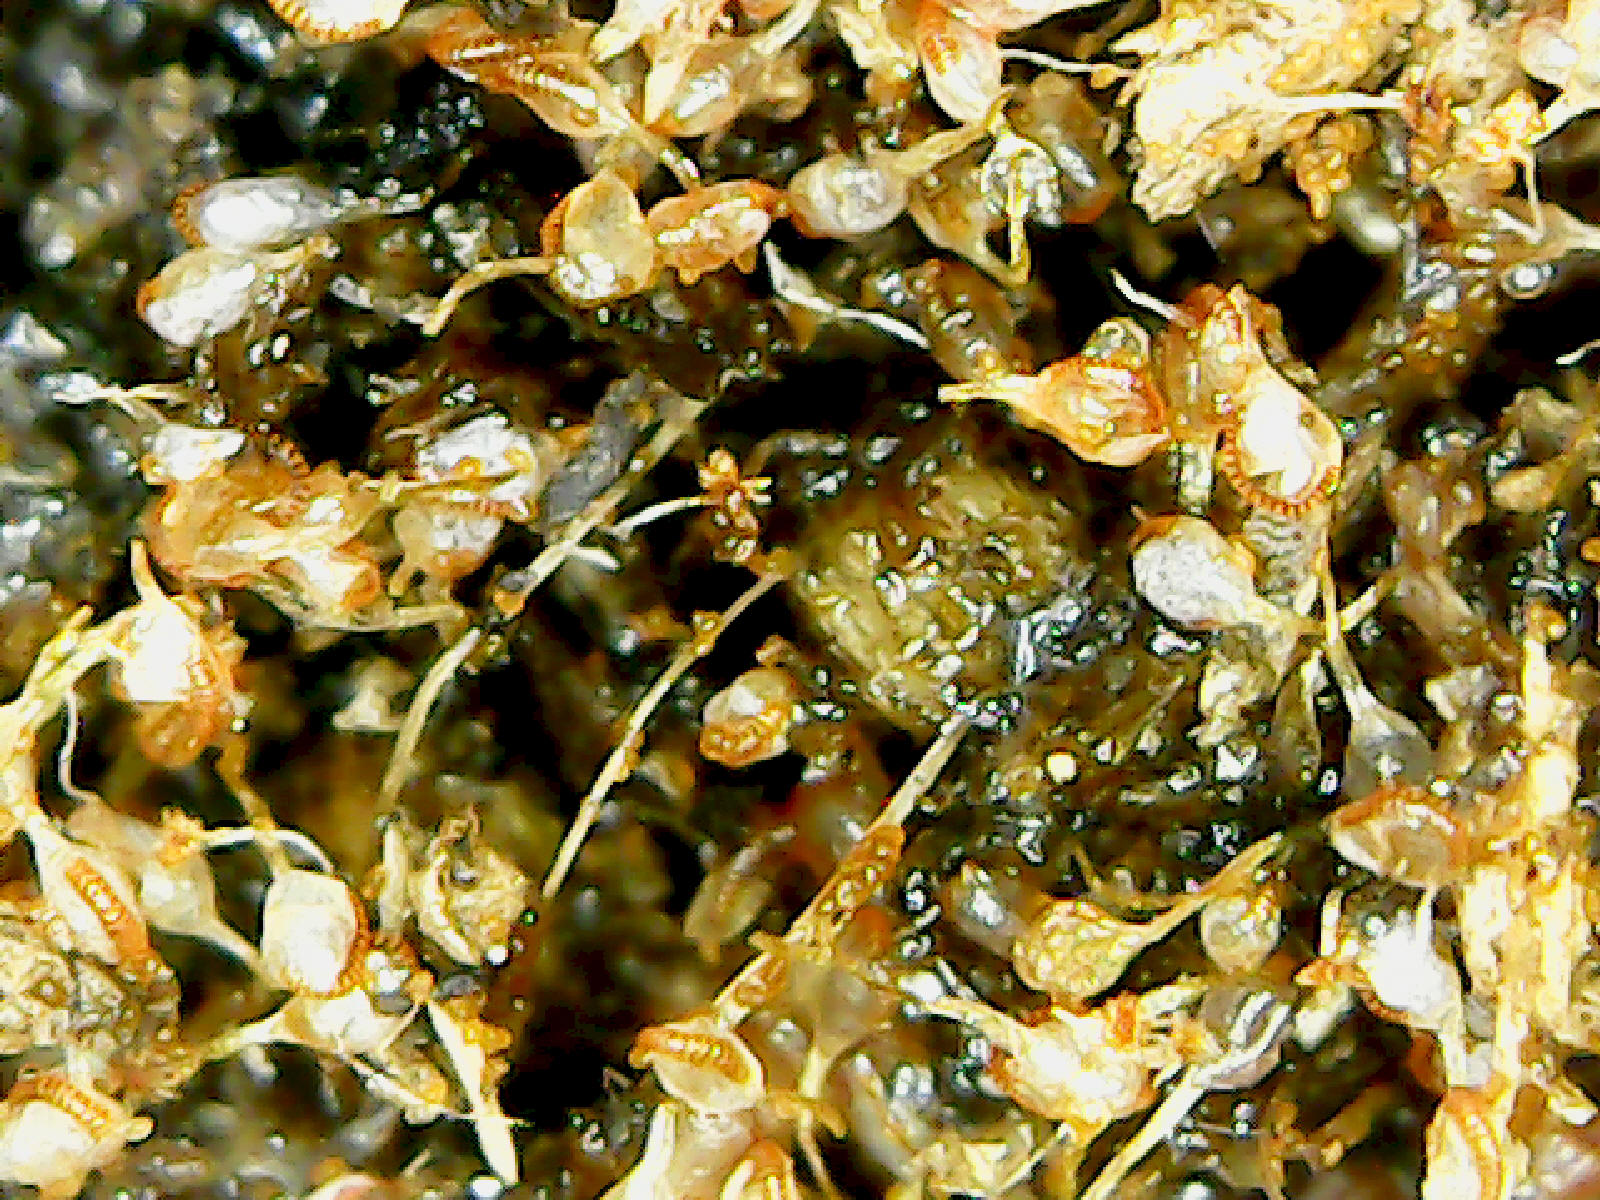
This photo shows the same as above, however the spore pods are from a P. superbum and are excessively covering a cup of Sunshine Mix 3 which is reported to be the best mix for propagating spore. The spore pods are the round things with tails or hairs. These are quite different from the spore pods of P. bifurcatum above. When the spore pod releases the spore, the spore have s sticky substance allowing them to stick to the top layer of the mix. The exhausted spore pod is called flack and falls to the bottom of the mix. The whole process occurs in a sealed container that develops its own atmosphere. The distilled water evaporates and then condenses on the top surface and then rains down on the spore allowing the prothallia to grow. |
|
Click on photos to enlarge |
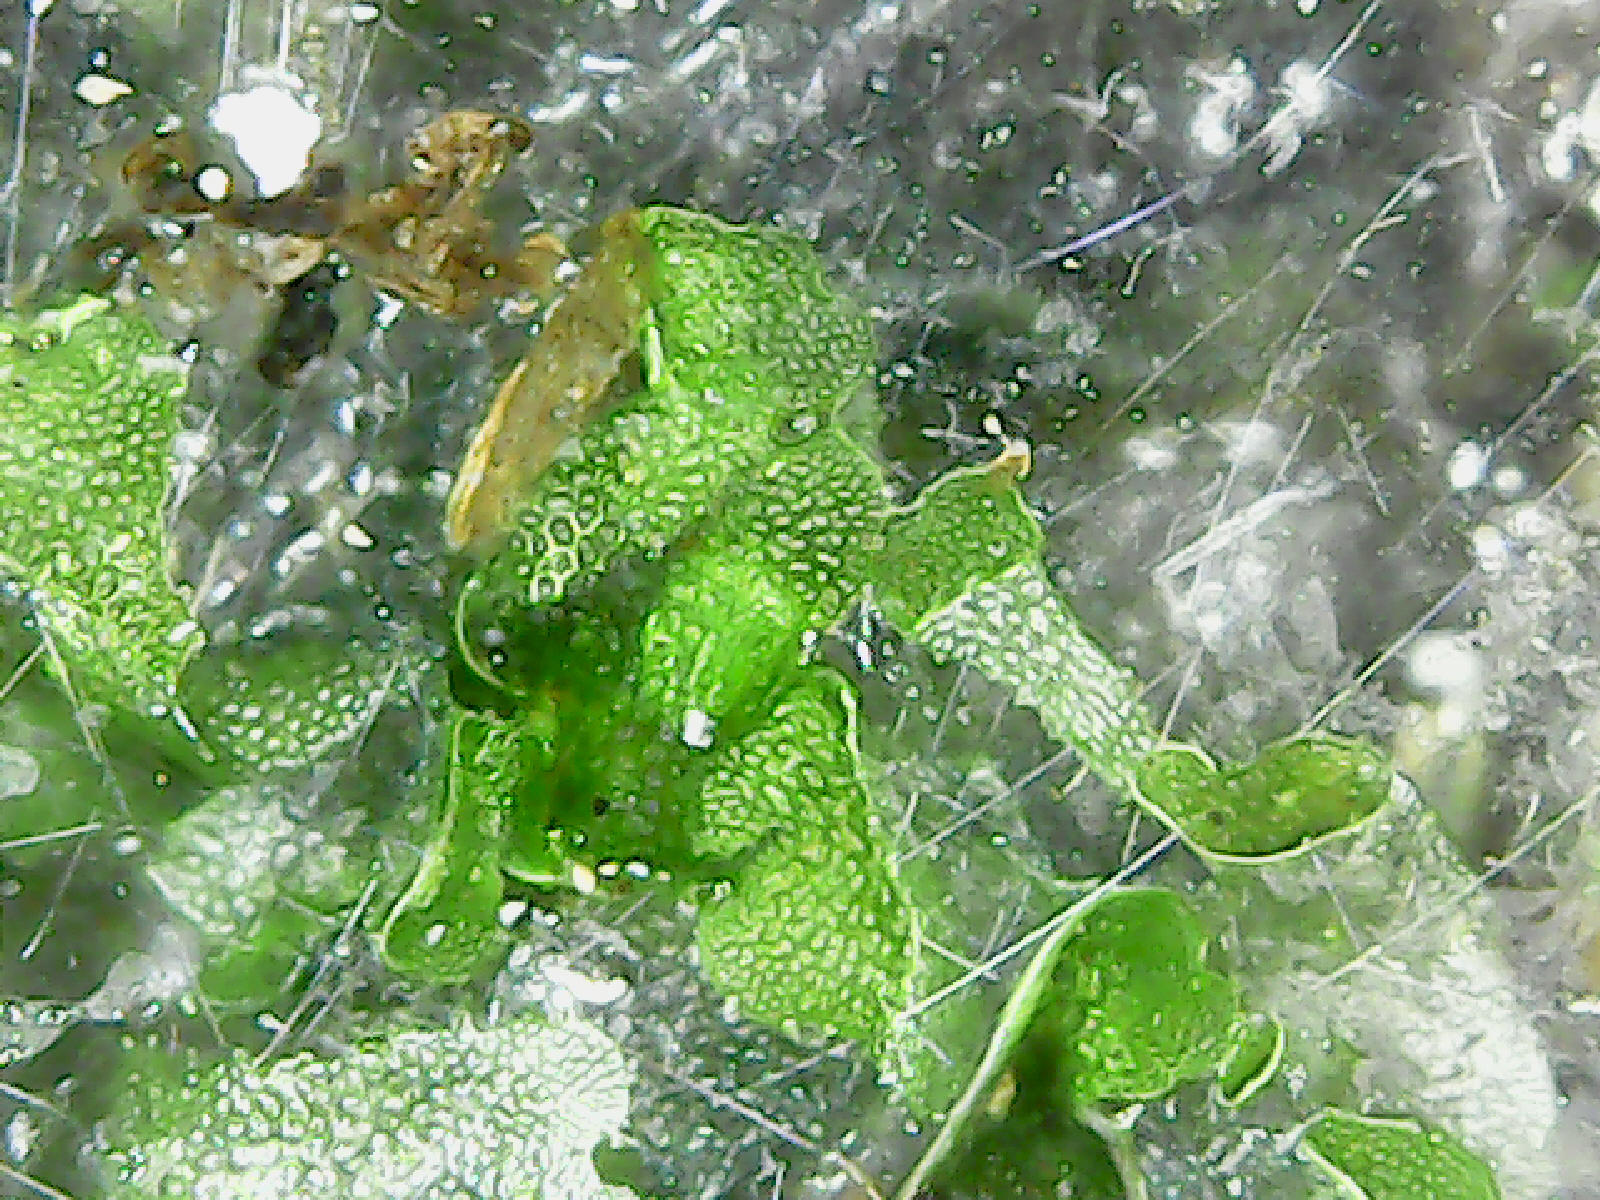
This photo of P. bifurcatum prothallia growing in a tray with Sunshine Mix 3. It has been growing for almost 2 years and is a good example where you can see the eggs on the surface of the green prothallia leaf. It is believed the male sperm are at the bottom of the prothallia leaf and swim up to the eggs to fertilize them. At this stage, it is wise to move small groups of the prothallia into larger trays with more space to grow. The original tray can continue to provide prothallia for many years if you keep removing healthy ones to new trays. |
|
|
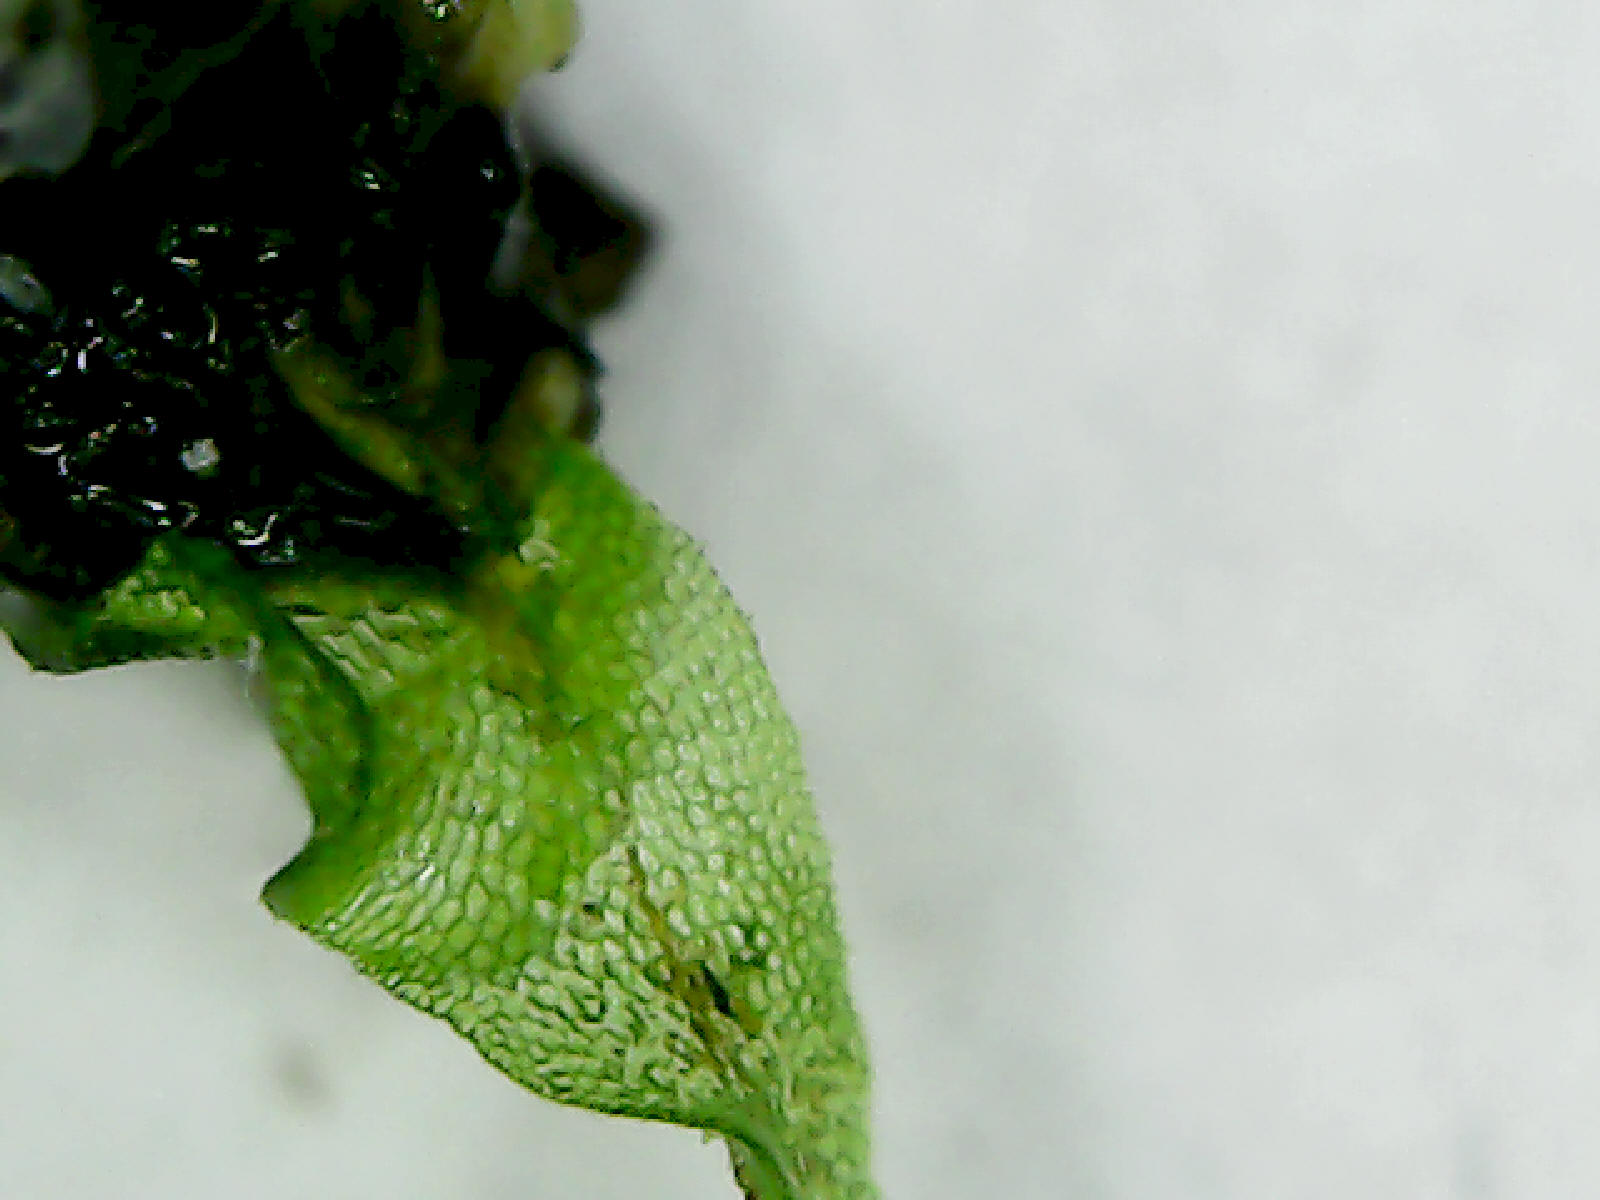
Enlarged prothallium leaf. The question
is are those small white areas eggs, or are they cells providing structure
to the leaf? Second question, where are the male sperm? |
|
|
|
|
|
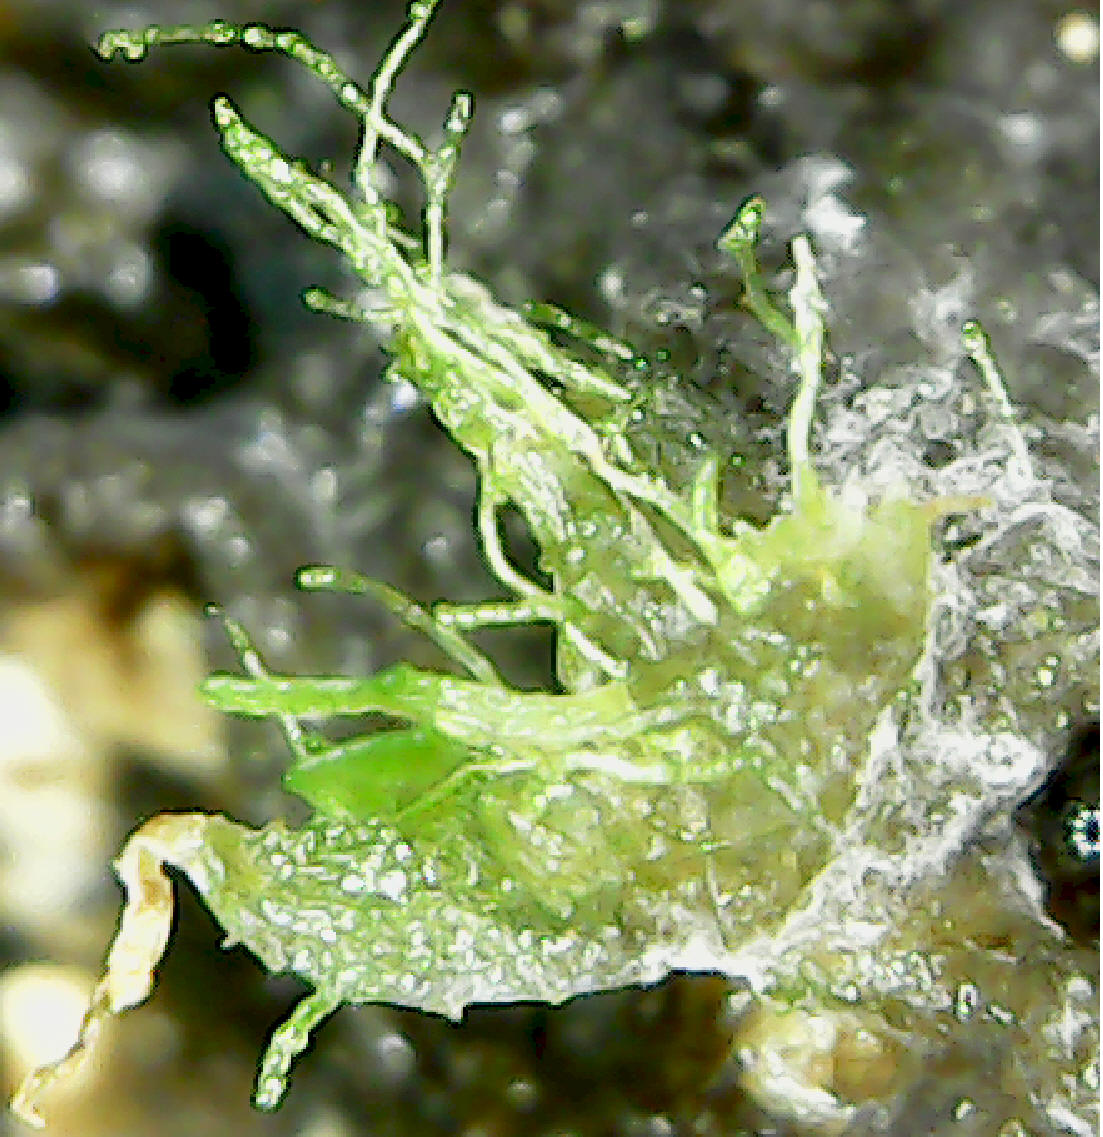
P. ridleyi. This is the very early stage of a new P. ridleyi. Experts tell me that the first growth of a new staghorn fern does not look like a staghorn, but the second generation of growth starts to show the traditional shape of the new plant. |
|
|
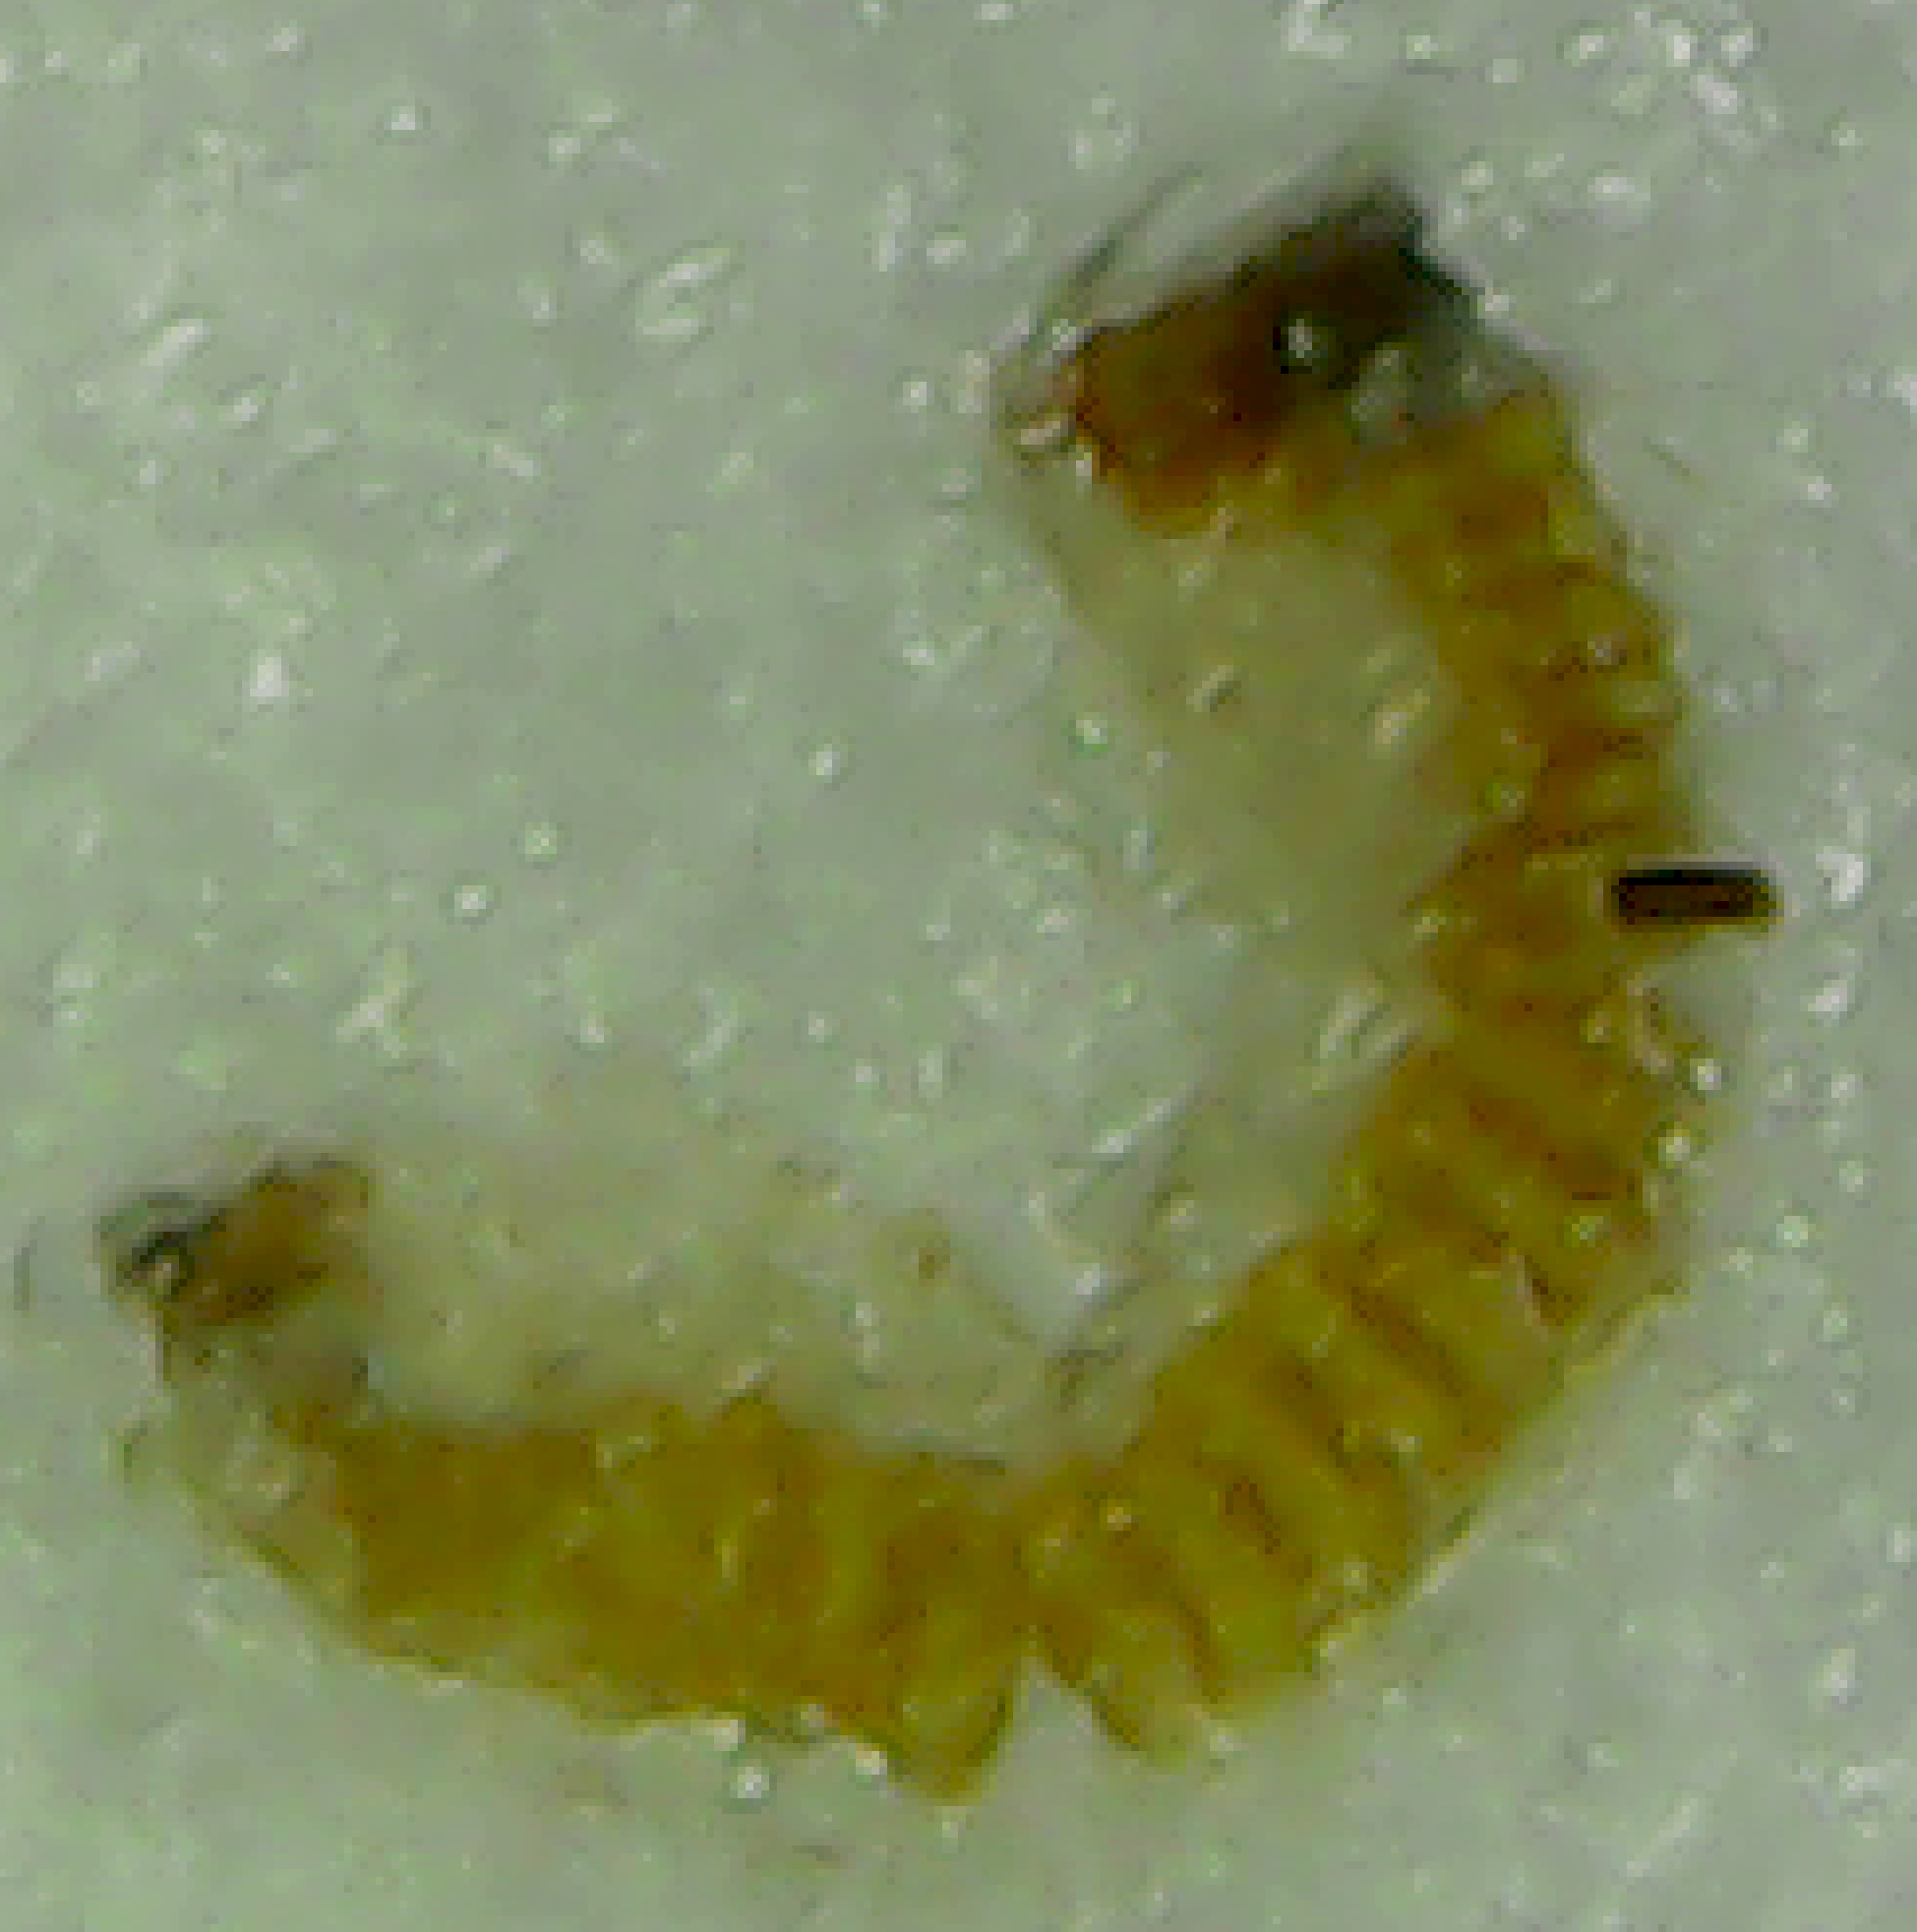
Spent sporangia. The spore was hosted inside the sporangia until ripe and released. |
|
|
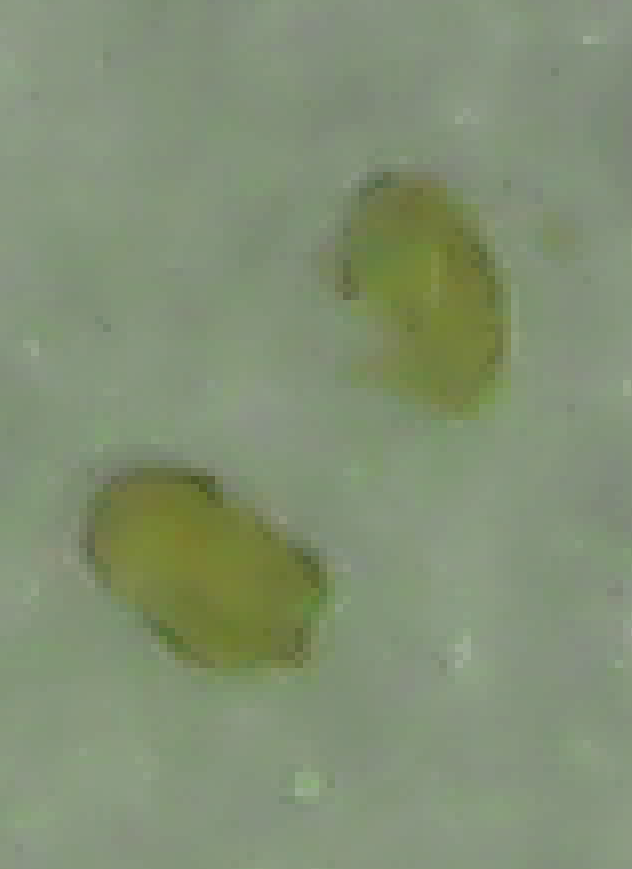
P. biforcatum spore - Individual spore cell from a
sporangia above. This single cell will grow into prothallia.
From there the prothallia will house both the eggs and male sperm.
The sperm will fertilize the eggs which will grow into a new platyderium
fern. The process may take 5 to 10 years to grow a sizable fern. |